macOS for Zephyr Development
Introduction
This document explains how to setup a development environment on macOS for the DevEdge IoT Developer Kit's RTOS and SDK.
Prerequisites
- A MacBook with USB ports.
- macOS Monterey version 12.0 or greater.
- A serial app.
Why would I want to implement the instructions in this document?
- To be able to upgrade or change the firmware on the DevEdge IoT Developer Kit.
Configuration
Step A
Backup your work. If you have previous installation of the T-Mobile RTOS and SDK downloaded on your machine, please save a copy of your work. If not, please skip to Step B.
- Save a copy of the following folders or all your work in progress will be deleted:
- $HOME/zephyrproject/DevEdge-IoTDevKit-ZephyrSDK
- $HOME/zephyrproject/zephyr
Step B
Intall Zephyr.
Follow the instructions here to install Zephyr.
-
Under Get Zephyr and install Python dependencies > Step 4, replace
west init ~/zephyrprojectwith
west init -m https://github.com/tmobile/DevEdge-IoTDevKit-ZephyrRTOS.git ~/zephyrproject
The rest of the instructions stay the same.
- Stop at the Build the Blinky Sample section.
Step C
Clone the T-Mobile Zephyr RTOS and SDK.
- Open Terminal.
-
Enter the following to download the T-Mobile Zephyr SDK, aka tmo_shell:
The release version will change over time.
cd ~/zephyrprojectgit clone https://github.com/tmobile/DevEdge-IoTDevKit-ZephyrSDK.gitcd DevEdge-IoTDevKit-ZephyrSDKgit checkout tmz-sdk-1.19.1-qa -
Clone the T-Mobile Zephyr RTOS repository:
The release version will change over time.
cd ~/zephyrprojectrm -rf zephyrgit clone https://github.com/tmobile/DevEdge-IoTDevKit-ZephyrRTOS.git zephyrcd zephyrgit checkout tmz-1.19.1-qa -
Refresh the Zephyr modules by running the following commands.
Do this whenever cloning or pulling the Zephyr repo.
cd ~/zephyrprojectwest update - Stop here if all you wish to do is upgrade your tmo_shell to the latest version.
Step D
Build your "Hello World" sample then flash the board.
-
Set the build environment by entering the below code into Terminal.
source DevEdge-IoTDevKit-ZephyrSDK/set-zephyr-build-env -
Connect to your IoT Developer Kit via serial app.
-
Connect your developer kit to your MacBook. Plug in your USB-C to USB-A cable into the board like in the screenshot below. Ensure that the USB-C end it plugged into the J-Link USB-C Debug port.

-
Open your serial app. For demonstration purposes we will use Serial.
-
Select the serial port that is connected to your IoT Developer Kit then click Open.
-
Under Terminal > Settings > Line Settings > Baud Rate make sure the following values are set then click OK:
- Baud Rate / Speed - 9600
- Data Rate - 8
- Parity - None
- Stop Bits - 1
-
Flow Control - None

-
At the command line screen press Enter on your keyboard. The uart command prompt appears. To learn more about uart, please read the document Interacting with the Kit at CLI via tmo_shell.

-
-
In Terminal, build the "Hello World" sample.
west build $HOME/zephyrproject/zephyr/samples/hello_world -p -b tmo_dev_edge Flash the "Hello World" sample onto the kit.
west flash-
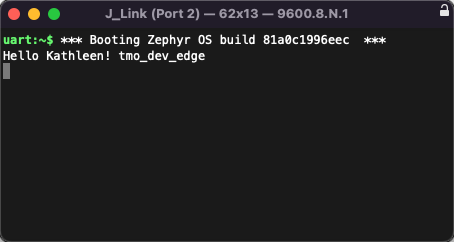
If the flash occurred successfully you should see the below screenshot in your serial app.

-
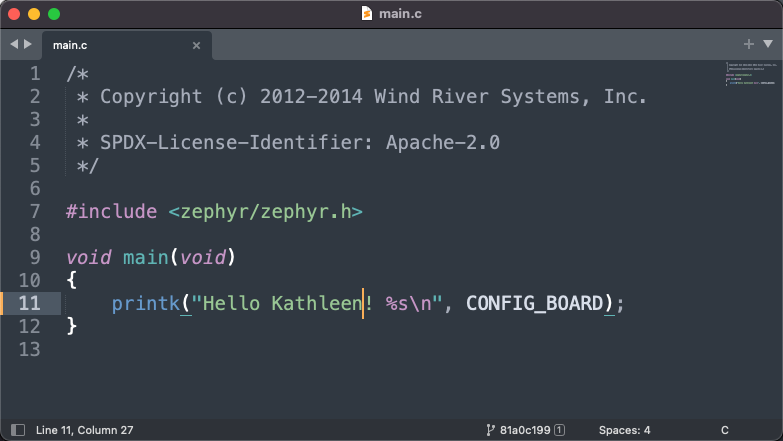
Update the code found in the $HOME/zephyrproject/zephyr/samples/hello_world/src/main.c file to create whatever project you desire.
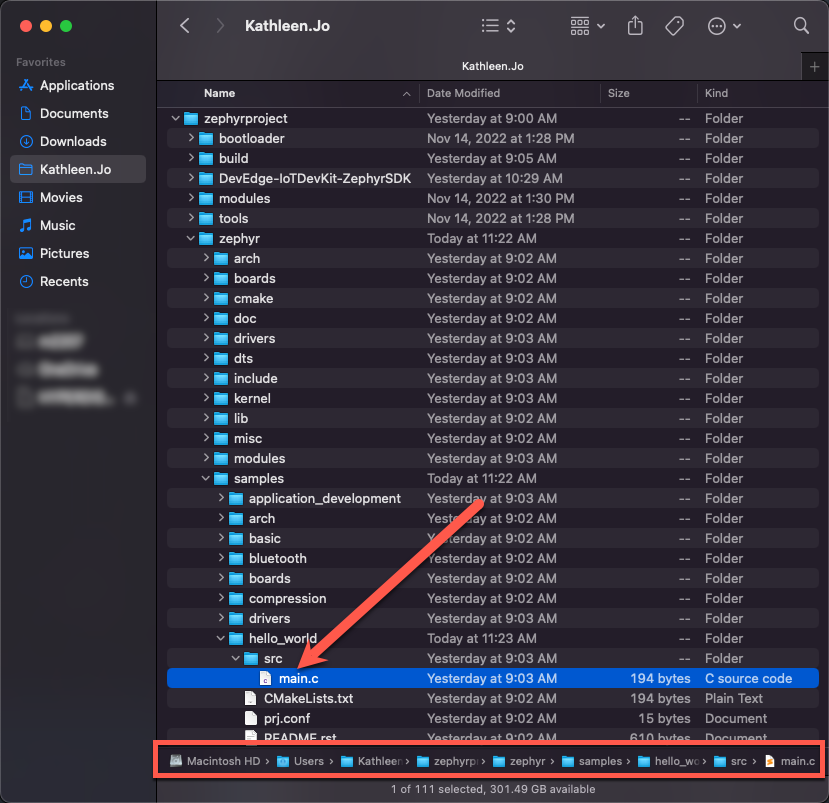
-
Flash the board again with your changes.
west flash -
Test that your "Hello World" project works.
Step E
Build your "tmo_shell" sample then flash the board.
-
Set the build environment by entering the below code into Terminal.
cd ~/zephryprojectsource DevEdge-IoTDevKit-ZephyrSDK/set-zephyr-build-env -
Enter the below in Terminal to build the tmo_shell sample.
west build $HOME/zephyrproject/DevEdge-IoTDevKit-ZephyrSDK/samples/tmo_shell -p -b tmo_dev_edge -
Flash the tmo_shell sample onto the kit.
west flash -
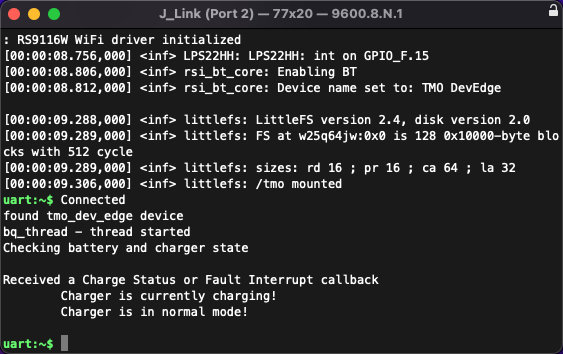
If the flash occurred successfully you should see, in your serial app, your kit going through a series of system checks then finally arrive at the following screenshot.
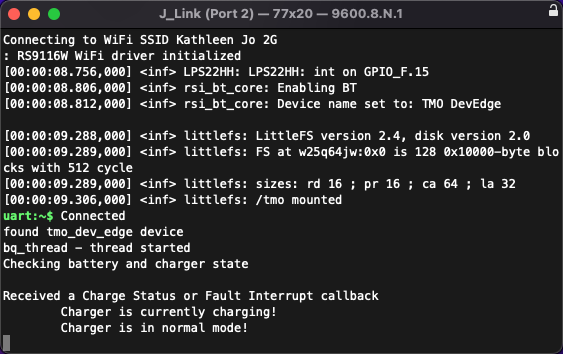
-
Press Return on your keyboard to get to the uart command line.

-
Enter
tmo versionto see the version of your SDK. It should be upgraded to tmz-1.19.1-qa. -
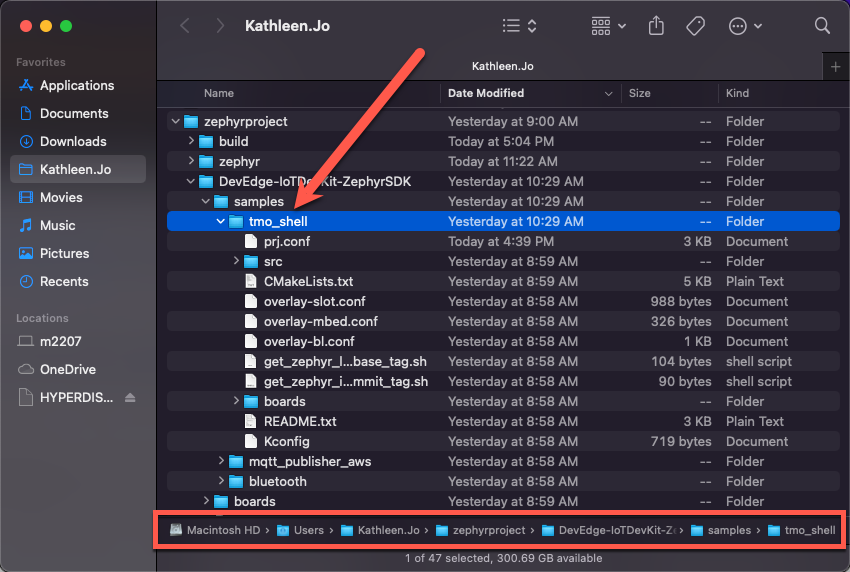
Update the code found in the $HOME/zephyrproject/DevEdge-IoTDevKit-ZephyrSDK/samples/tmo_shell folder to create whatever project you desire. To understand what the various files in the tmo_shell folder do, please see the Description of tmo_shell Source Files document.
-
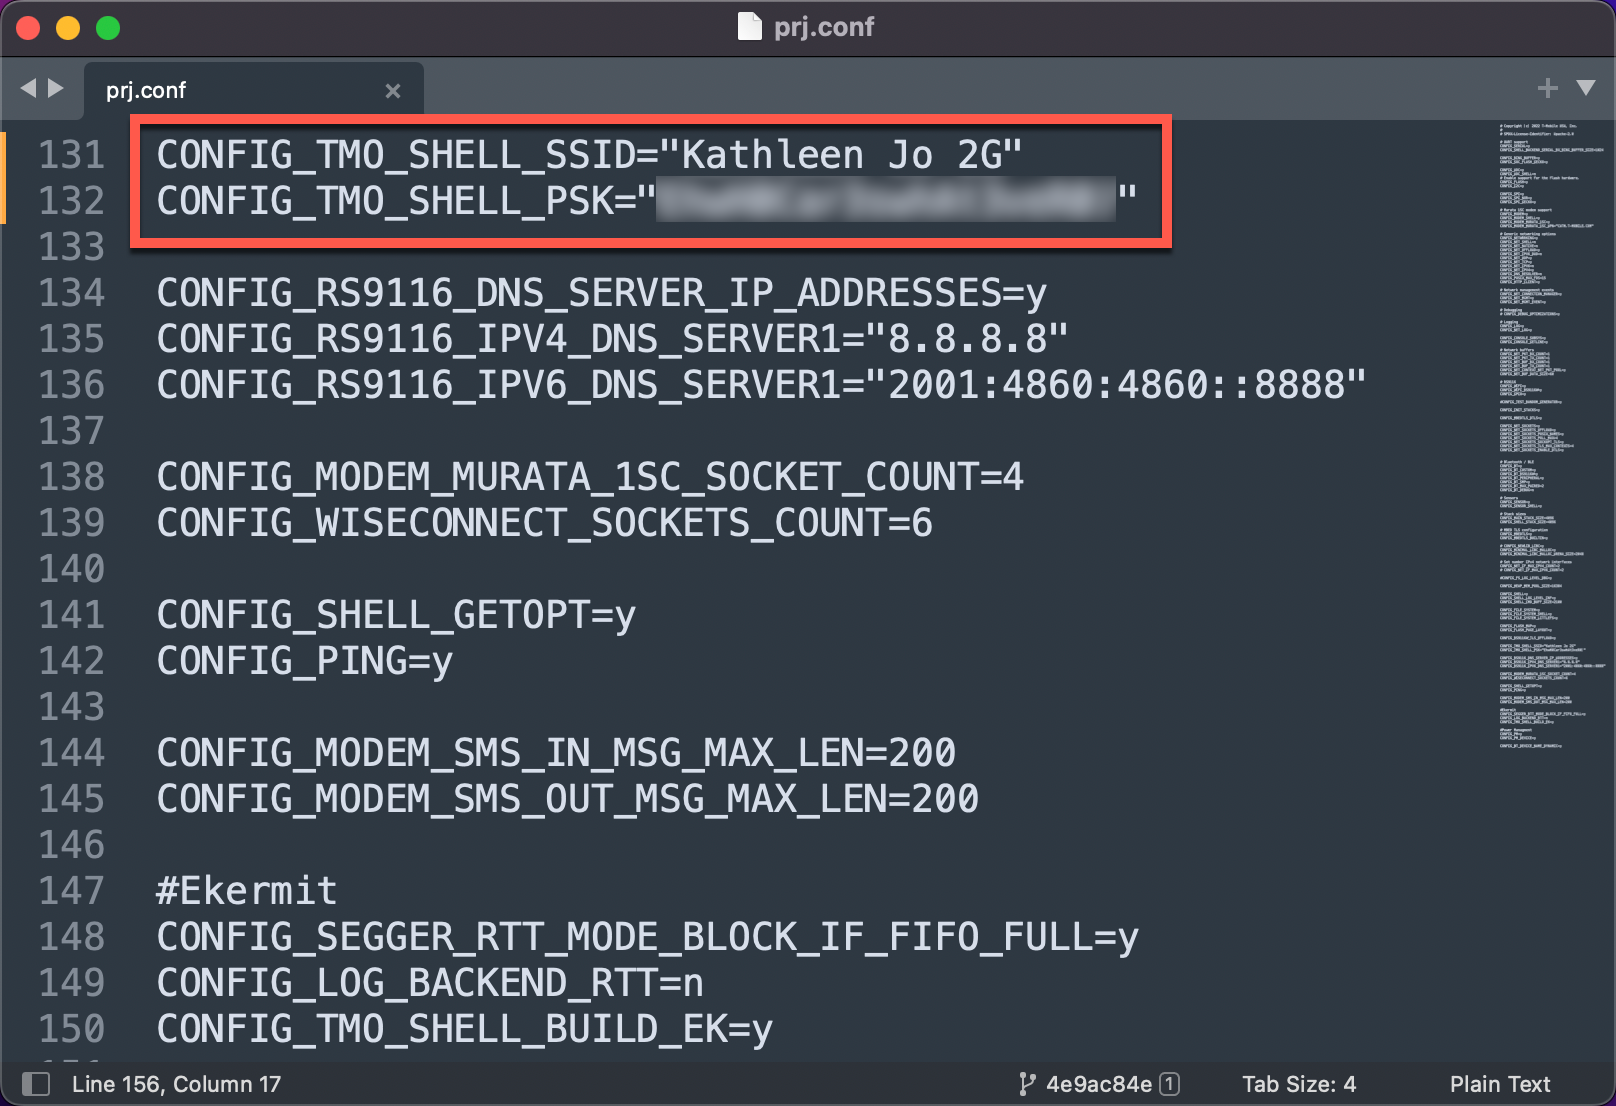
An example of a source file update is setting the SSID and PSK for Wi-Fi.
-
Open the $HOME/zephyrproject/DevEdge-IoTDevKit-ZephyrSDK/samples/tmo_shell/prj.conf in your IDE.
-
Find the
CONFIG_TMO_SHELL_SSIDandCONFIG_TMO_SHELL_PSKvariables.
-
Set the arguments to your Wi-Fi SSID and PSK then save the file.
-
Open your Terminal app, change directories to zephyrproject, then set your build environment.
cd ~/zephryprojectsource DevEdge-IoTDevKit-ZephyrSDK/set-zephyr-build-env -
Build the tmo_shell sample.
west build $HOME/zephyrproject/DevEdge-IoTDevKit-ZephyrSDK/samples/tmo_shell -p -b tmo_dev_edge -
Flash the sample onto the kit.
west flash -
In your serial app, your kit goes through a series of system checks then finally arrives at the following screenshot. Press Return on your keyboard to get to the uart command line.
-
Enter
tmo wifi status 2. Instead of having to entertmo wifi connect 2 "<SSID>" 0 "<PSK>"you'll notice that you are already connected to Wi-Fi automatically.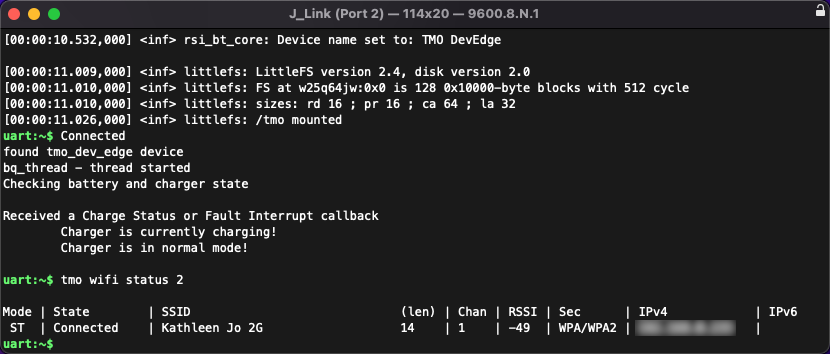
-
Open the $HOME/zephyrproject/DevEdge-IoTDevKit-ZephyrSDK/samples/tmo_shell/prj.conf in your IDE.
-
Update any other source files you desire.
-
Flash the board again with your changes.
west flash - Test that your tmo_shell project works.
Troubleshooting
- Issue 1 - I cannot get my "Hello World' project to work on the IoT Developer Kit. What could be the problem?
-
Solution 1 - Try doing another
west updatein the thezephyrprojectfolder then flashing the board again.
- Issue 2 - What should I do if I receive a "realpath doesn't exist on OSX" error message?
Solution 2 - Run the following command in Terminal.
brew install coreutils
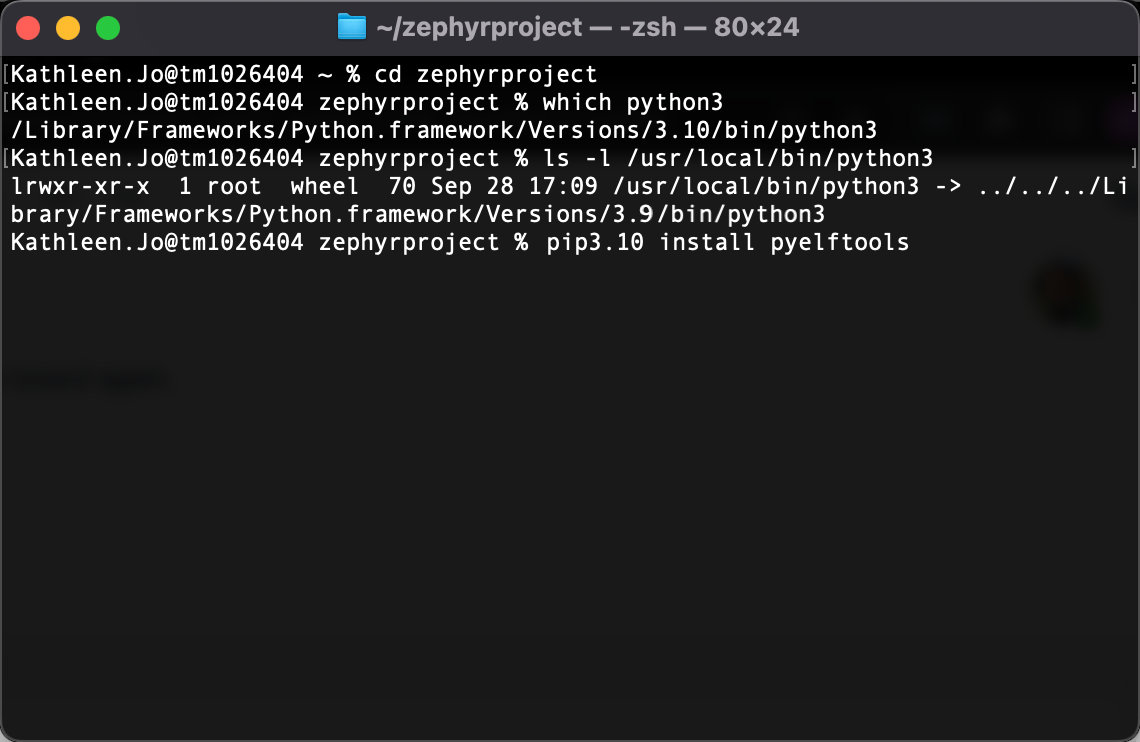
- Issue 3 - I do not have pyelftools installed on my MacBook. Can this cause errors with my development environment?
-
Solution 3 - Yes it can. Please do the following:
-
Check the version of Python that is associated with "python3":
cd ~/zephyrprojectwhich python3ls -l /usr/local/bin/python3 -
Install pyelftools based on that version of python
pip3.10 install pyelftools -
A screenshot of what that check and install would look like.
-
FAQ
- Question 1 - Will these instructions work on a Windows OS?
- Answer 1 - No it will not. Please see the Windows OS for Zephyr Development doc for further details.
- Question 2 - What do the different files in the $HOME/zephyrproject/DevEdge-IoTDevKit-ZephyrSDK/samples/tmo_shell folder do?
-
Answer 2 - Please see the Description of tmo_shell Source Files document to learn more.